Quick Guide On How To Integrate Paystack Payments API Into A Website Using Nextjs
This technical article provides a step-by-step procedure for integrating the Paystack payment API into a NextJs-powered website. In this article, we are going to utilize Paystack’s pop-up display payments feature. However, there are additional features which include the redirect and mobile SDK options.
Knowledge Requirements:
To properly make use of this information, you should have some experience with:
Javascript
Next Js and
React Js
TECHNICAL REQUIREMENTS:
To flow along effectively with the directions of this document, you should have in existence:
An already created or existing Next Js project.
A Paystack account, set to test mode. Unless you intend to build for real-life usage and accept real payments.
NOTE:
For this lecture, we’re going to use the pop-up option for the configuration of the payment. This means that when a user initiates a payment action on your website maybe by clicking on a BUY or PAY NOW button, a modal will pop up bearing Paystack’s payment UI.
In the VSCode project displayed as image examples within this project, there are two major javascript files:
A formControl file that would contain a form element.
A paystackInterface file that would contain a code snippet copied from Paystack’s documentation.
Any of these files may be referenced in this documentation, therefore try to remember their use cases.
STEP 1: REQUIREMENTS FROM PAYSTACK
- To use Paystacks payment API, you must sign up and create an account with them. This would enable you to have access to your API keys which are necessary to validate API calls.
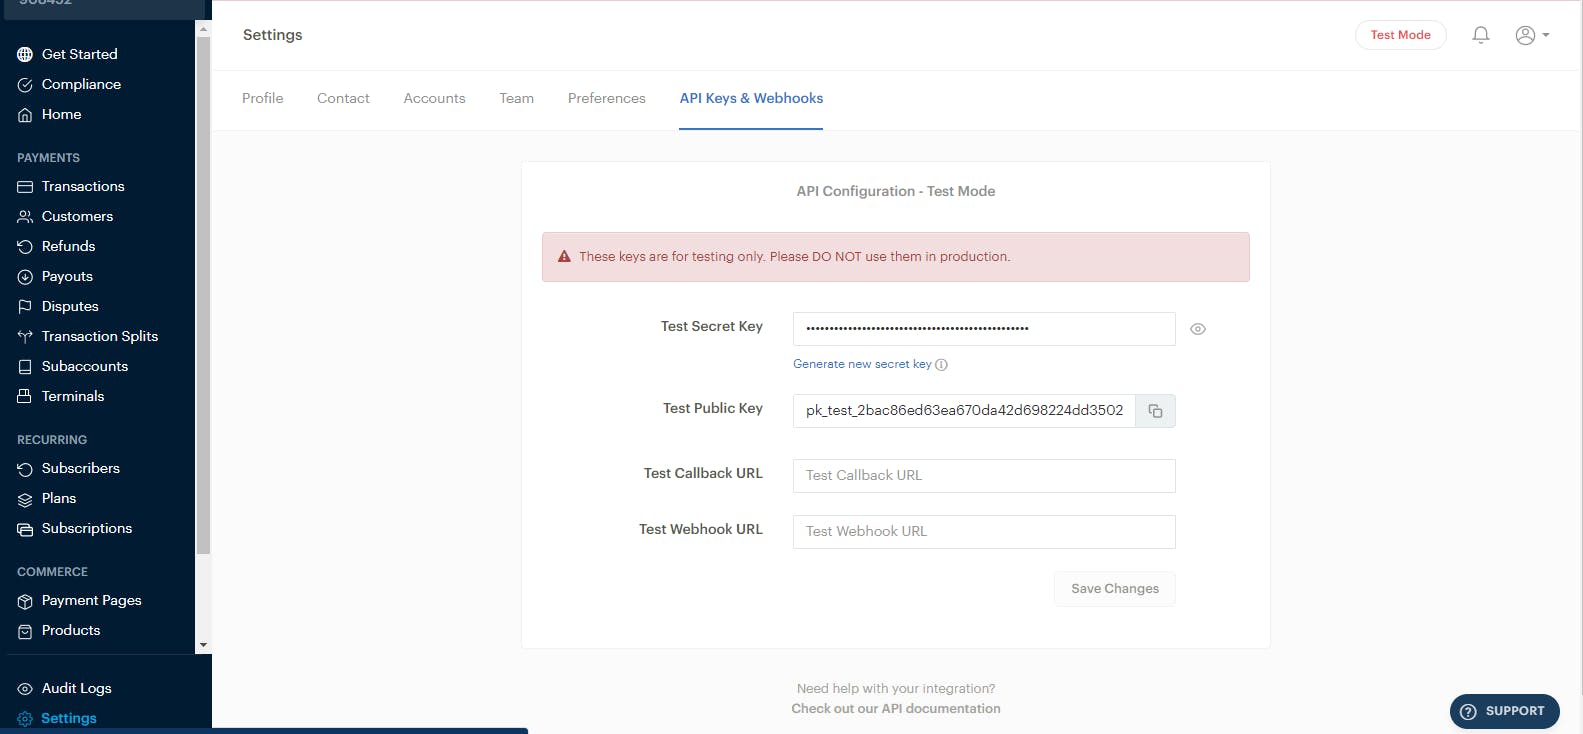
To get your api keys:
Go to the paystack dashboard
Get to settings
Navigate to “ API Keys & Webhooks”
Underneath the nav bars, you’ll find your API public and secret keys. You can copy and store them somewhere for future use, or you can create a .env file in your project and store them in it.
To initialize a payment operation, you’ll have to collect a user’s data. The process of doing this entails that you create a form bearing an input field and an amount field (necessary). However, you can also pass some optional information in the
metadataobject field such as currency, label, ref etc.Visit https://paystack.com/docs/payments/accept-payments for the complete list of optional parameters.
To complete the above step, create a component file that would house a form like the one in the figure below. The form would collect a user’s email address and payment amount.
Next, create a handleSubmit and a handleChange function. The handleSubmit and handleChange functions would help you to update the state and eventually export the collected user’s inputs to the handlePayment function which will handle the major payments’ execution.

To ensure better numerical accuracy, convert the amount value to a float data type by using the parseFloat method to wrap it.
Make sure to import the Script component from next/script. This would enable you to install Paystack’s javascript script effectively.
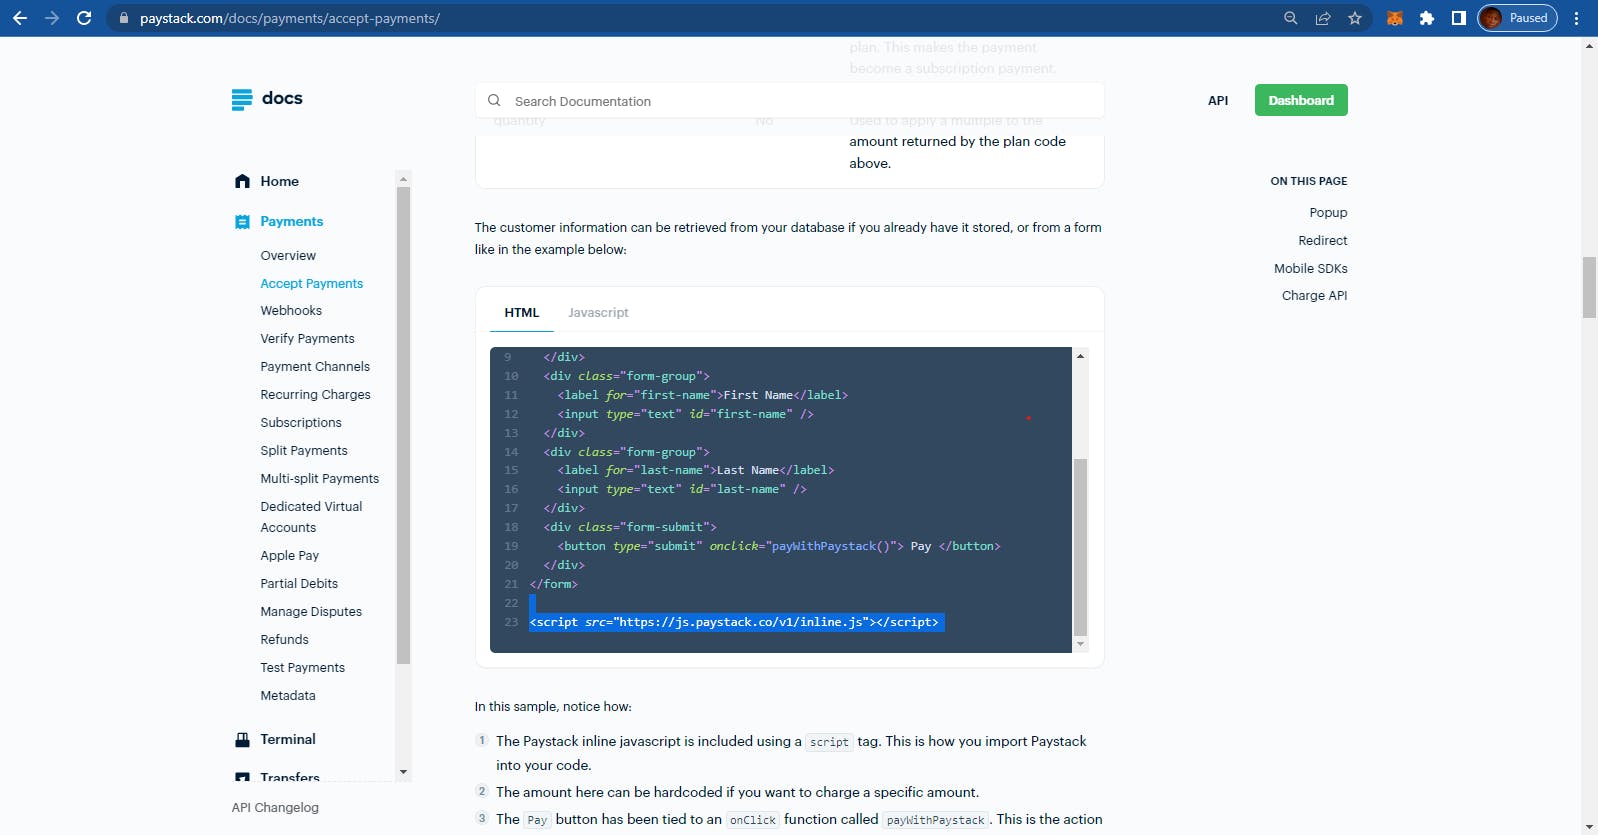
On Paystack’s accept payments page, copy the script from the HTML code snippet and add it to your form’s page. It should look like the snippet below.
STEP 2:
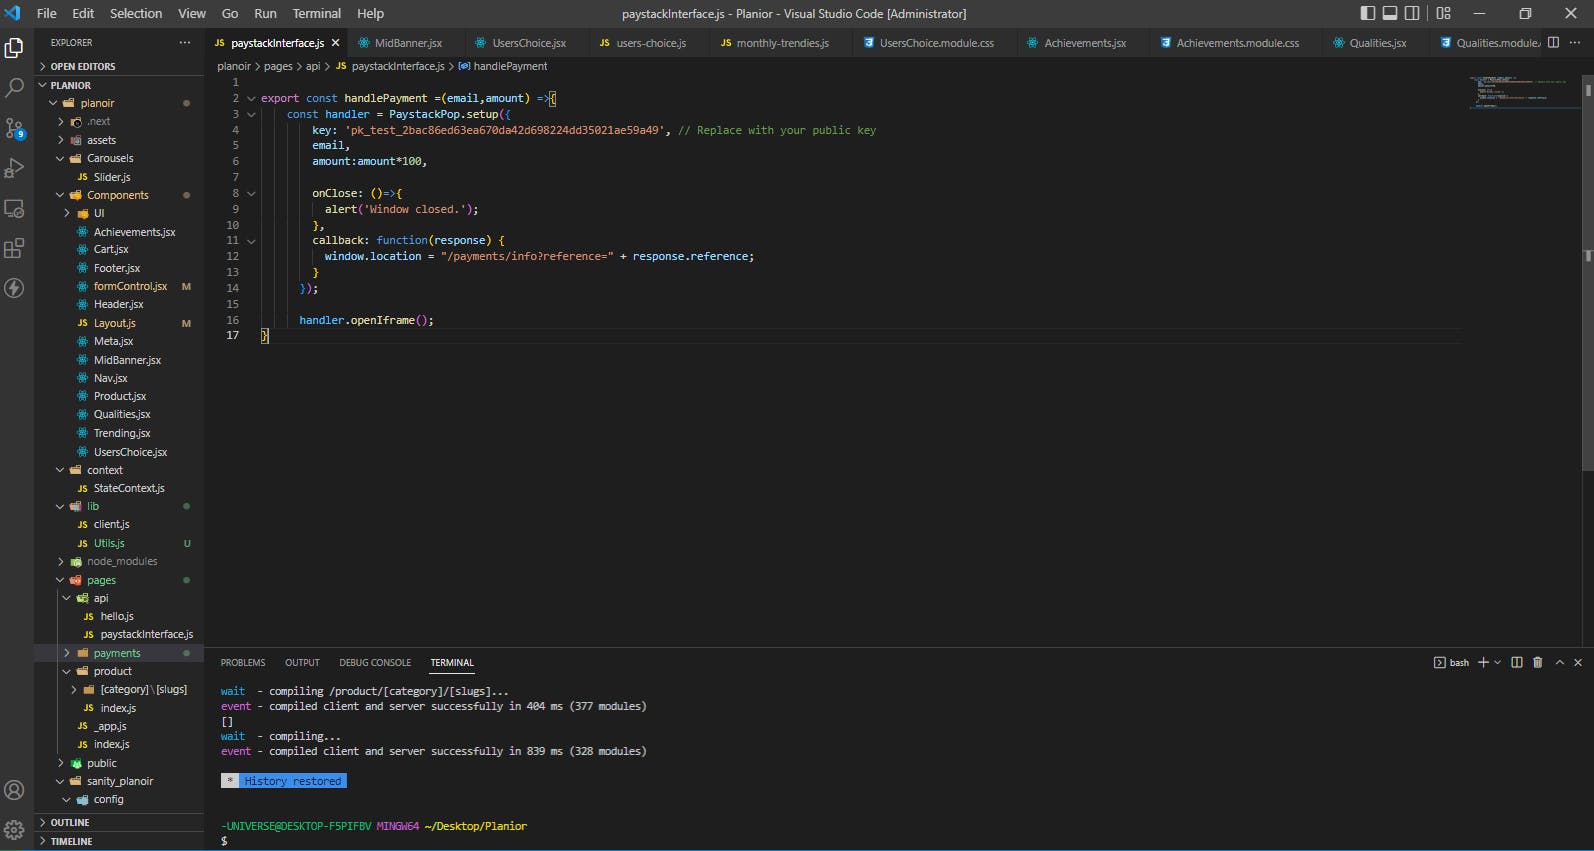
On your file structure, navigate to pages>api and create a new javascript file. This file will contain a Paystack code snippet for completing the API request. You can choose to call this file any name that you wish. I used the name, paystackInterface for mine.
Create a handlePayment export function in the file.

Go to the paystack’s Accept payments page and copy the below javascript code snippet, starting from the “let handler” part of it till the end.
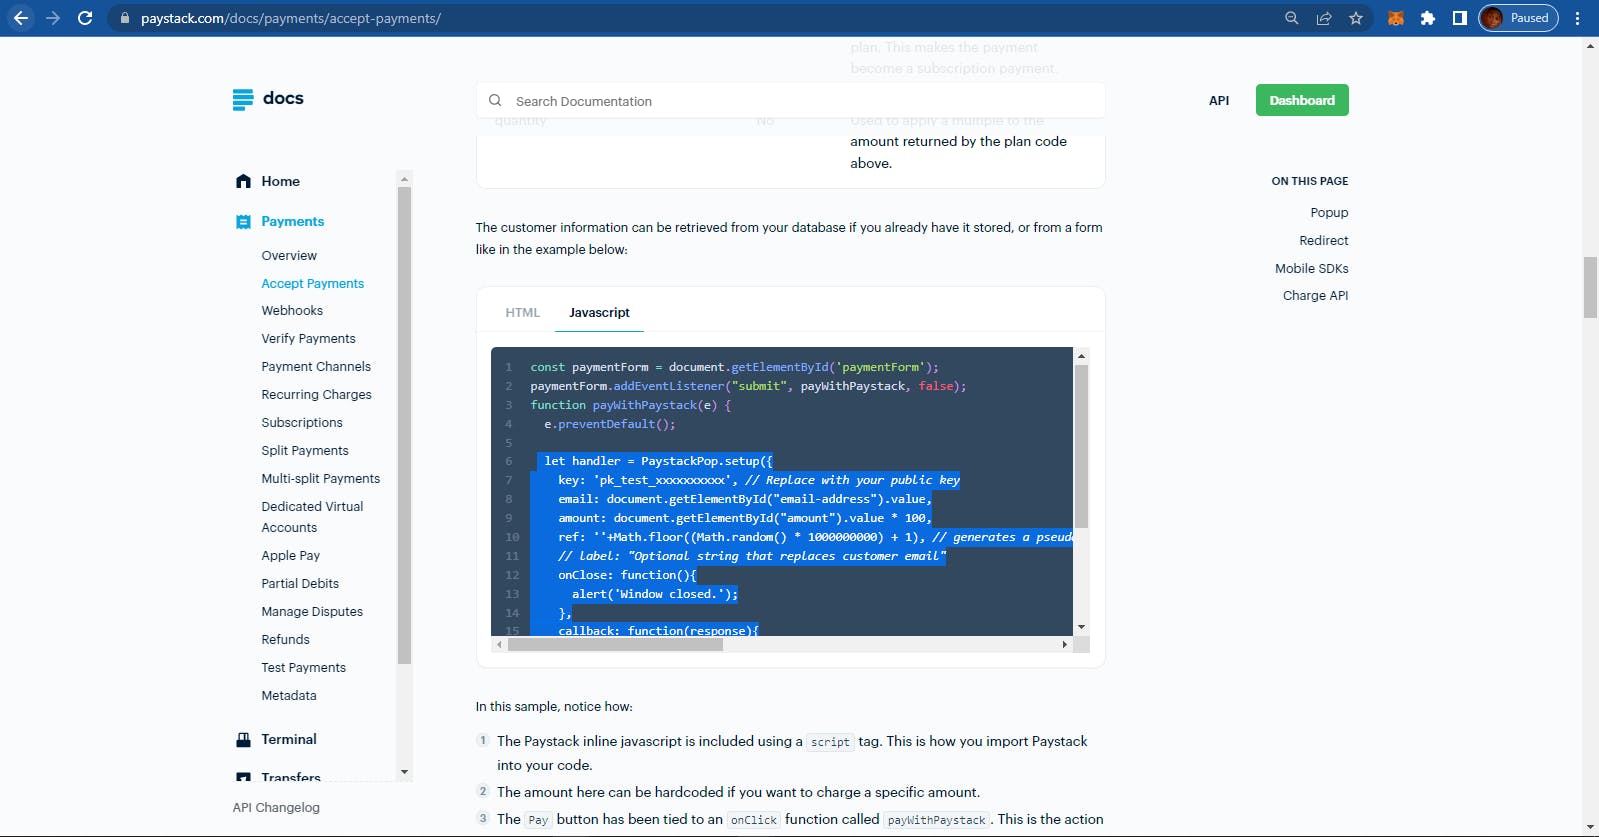
Paste into your project. After this, you would have to make some minor changes:
Clear out the document.getElementById… value in the email field because you’ve already passed the email in the form.
Clear out the document.getElementById… value in the amount field and replace with – amount*100 to convert from naira to kobo.
You can clear the reference to obtain an auto-generated one from Paystack.
Change the other variables such as the API keys from the default values to your keys.
STEP 3:
Return to your formControl component, import the handlePayment function and pass in the email value and amount value to the handle payments function.
After this, test to confirm that the API is working efficiently by running your program.
VERIFYING PAYMENT TRANSACTIONS
To verify a transaction, you’ll have to use the Paystack verification API. The process to achieve this demands that you do the following:
Return a transaction reference string from the Paystack payments integration code snippet which you’ve previously copied into your project folder. Through the callback parameter in the snippet, you’ll attach the transaction’s reference value to the callback’s URL. This should look like this:
In your local project’s formControl file, extract the transaction reference string by using the useRouter() hook. This should look like this:
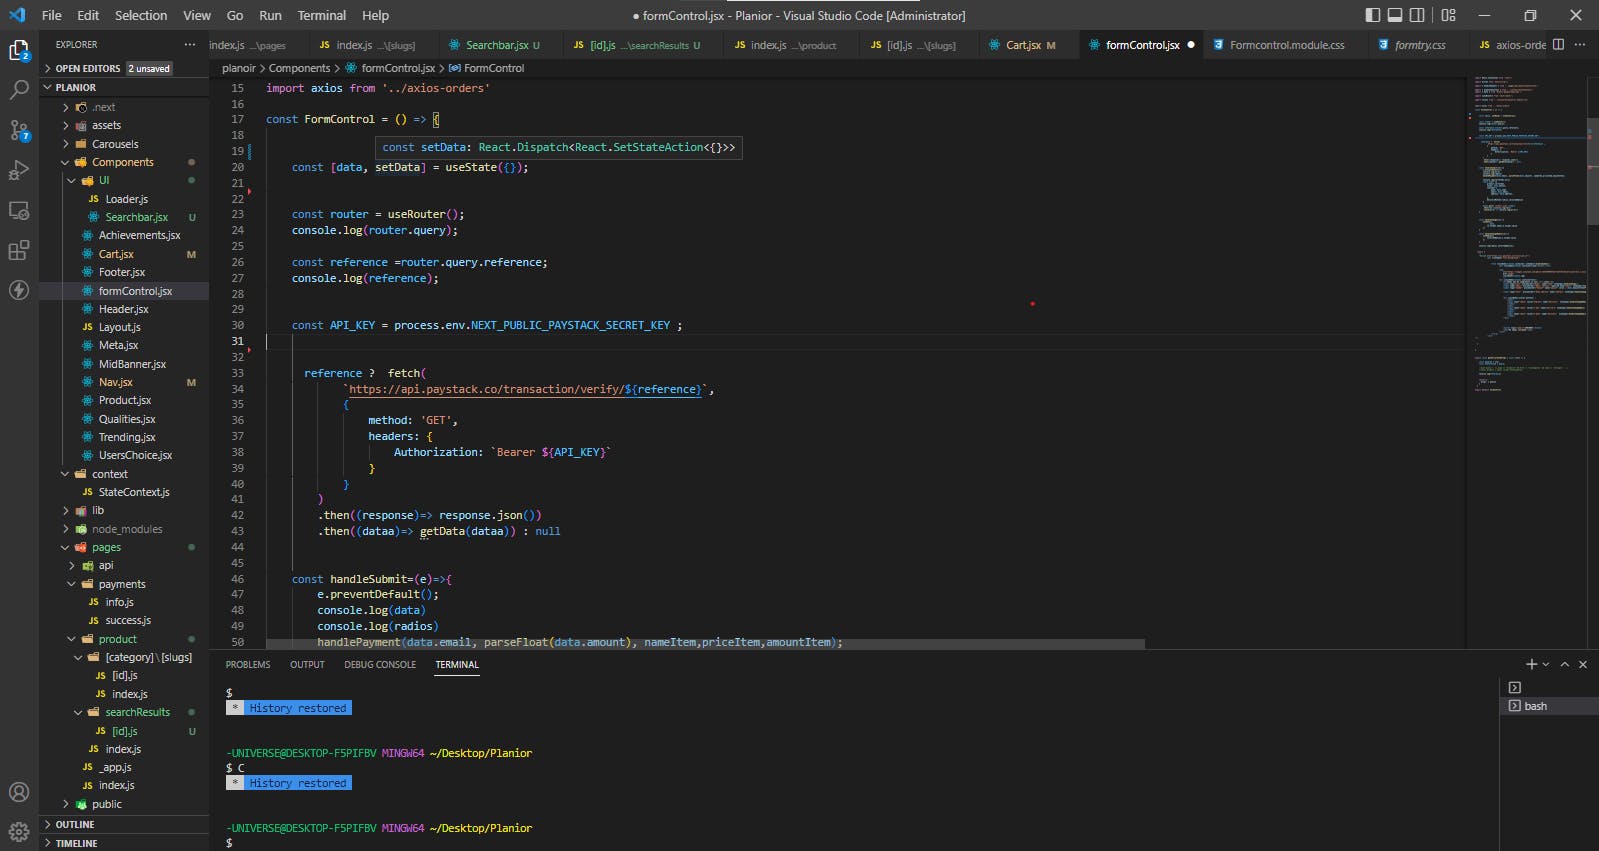
Visit Paystack’s transaction verification webpage and copy the verification API link.
Substitute the reference variable with your extracted transaction reference value and replace the default API string in the Authorization field with your API secret key. Make sure you remove the colon sign.
Make an API call using the formatted API link and extract the verification data from it. The correct verification result is located in the response.data.status field.
Run and test your program for any bugs. If any, trace back the error and correct it.
Thanks for reading. If you have any additional question or if this method doesn’t work for you for any reason, please feel free to contact me on twitter @KachiCodes for better explanation.
